How to completely disable font smoothing in Windows 7
I admit that as a Windows user the ClearType fonts are pleasant to look at and offer a nice environment in Windows. However, as developer, I’m usually strongly focused on the screen looking at tons of lines of code, plain text, documentation, etc. Several hours per day. In this scenario, any kind of font smoothing is just pain in my eyes. I need crispy, crystal-clear, defined and aliased letters to work with.
There are some articles out there on how to disable font smoothing, but I still had to join the info from two or three of them in order to completely erradicate font smoothing in windows. Here is everything joined together.
1. Disable font smoothing, cleartype, and ensure that Windows won’t use the Segoe UI font
Create a text file with Notepad, copy & paste the text below and save it as a .reg file, then combine it with the Registry.
Windows Registry Editor Version 5.00

[HKEY_CURRENT_USER\Control Panel\Desktop]
"FontSmoothingType"=dword:00000001
"FontSmoothing"="1"

[HKEY_LOCAL_MACHINE\SOFTWARE\Microsoft\Windows NT\CurrentVersion\FontSubstitutes]
"Segoe UI"="MS Sans Serif"

[HKEY_LOCAL_MACHINE\SOFTWARE\Microsoft\Windows NT\CurrentVersion\FontsRemoved]
"Segoe UI (TrueType)"="segoeui.ttf"
"Segoe UI Bold (TrueType)"="segoeuib.ttf"
"Segoe UI Bold Italic (TrueType)"="segoeuiz.ttf"
"Segoe UI Italic (TrueType)"="segoeuii.ttf"
"Segoe UI Light (TrueType)"="segoeuil.ttf"
"Segoe UI Semibold (TrueType)"="seguisb.ttf"
"Segoe UI Symbol (TrueType)"="seguisym.ttf"

[HKEY_LOCAL_MACHINE\SOFTWARE\Microsoft\Windows NT\CurrentVersion\Fonts]
"Segoe UI (TrueType)"=-
"Segoe UI Bold (TrueType)"=-
"Segoe UI Bold Italic (TrueType)"=-
"Segoe UI Italic (TrueType)"=-
"Segoe UI Light (TrueType)"=-
"Segoe UI Semibold (TrueType)"=-
"Segoe UI Symbol (TrueType)"=-

; This is for Word2007
[HKEY_CURRENT_USER\Software\Microsoft\Office\12.0\Common]
"RespectSystemFontSmooth"=dword:00000001
2. Ensure that all Windows UI components are using MS Sans Serif
Right click Desktop > Personalize > Window Color > Advanced Window Color and Appearance. Navigate through all the elements at the Item dropdown menu. Choose MS Sans Serif for all items that allow a font to be selected (even if the Font option is initially empty).
As the only exception, I’d recommend you to choose Tahoma 8 for the item Active Title Bar. This will make the title bars easier to read.
3. Restart the computer
Ready! You have crystal clear, crisp, aliased font in Windows 7 just like Windows XP.
How to move the AppData folder to a different location
Two important considerations:
- It’s better to do this right after installing the OS. Moreover, the best practice is to setup either two partitions in the same disk or using two disks, one for the system and other for the data.
- It’s better to change the entire Users or Users\<user> folder instead of just moving some of the user’s folders out of the user root folder. Many applications take the %USERPROFILE% path, and then append the desired path (see the %TEMP% environment variable, for instance).
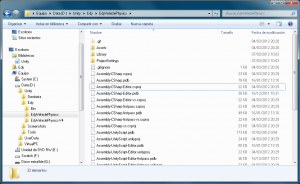
Most user folders like My Documents, My Images, etc. can be relocated simply by right-click them, Properties, Location, and selecting a new location. However AppData doesn’t have such option.
The trick for AppData is that despite this folder doesn’t offer the “Location” option, the three folders inside it (Local, LocalLow, Roaming) do have it! So you can change each one’s location in the easy way.
However, AppData\Local will show an error when trying to move it. This is because some applications (even Windows processes) “hardcode” its location based on the %USERPROFILE% path, so they are not aware of the new location. The trick for AppData\Local is:
- Right-click AppData\Local, Properties, Location, Move, select a new location.
- When prompted to move the files, answer Yes. An error will show telling that some file could not be moved. Click Skip for each one. Even that, the operation will be “voided” as the moving wasn’t successful.
- Repeat 1 and select the same location, but when prompted for moving the files, click No this time. The change of location will be successful this time, as the files are already there (those that could not be moved are irrelevant).
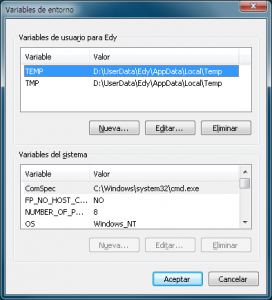
Now open the modify the Environment Variables for your account (search for Environment Variables at the Start menu). You must modify the path for TEMP and TMP variables to specifically point to the new location.
Restart your computer and you’re done.
You can now remove most of the previous AppData folders. Leave those folders which give you an error when trying to delete them. This is because some programs that had been installed previously have already taken those paths, or they are building the paths based on the %USERPROFILE% folder. Typically this is not a problem at all, as for now on most of the AppData files will be stored at the new location.
Useful tricks for Solid State Drives (SSD)
SSD drives are superfast (7.4 out of 7.9 in Windows score), so they are perfect for holding the OS. However, the main drawback is that the performance on these drives gets degraded with time due to the write operations. Life with top performance can be extended by limiting the write operations:
- Install Windows in the SSD and use a conventional disk drive as data drive.
- If doing a fresh install of Windows 7, select the conventional disk as location for the Users and ProgramData folders (Advanced)
- Otherwise, move the folders Documents, Pictures, Desktop, etc. in the conventional way (right-click the folder, then Location). Also with AppData as described above.
- Disable Hybrid Sleep, and Hibernate only if it’s strictly necessary. Both Hybrid Sleep and Hibernate dump the entire memory to a file in the main system drive. This usually means a significant fraction of the SSD space! (as much Gb as your RAM) Disabling Hybrid Sleep allows you to either use the regular sleep mode or hibernate the computer as your choice.
- If you really need/want Hybrid Sleep, then you may find useful to prevent the mouse from waking up your computer, which may accidentally force you to sleep the computer (and dump the memory) again.
- Disable Windows Search indexer. Looking at the Windows Performance Monitor you’ll realize this single feature is by far the one that performs most writes to the main drive. It caches its data to the C:\ProgramData folder, but it has been reported that moving this folder, even using filesystem junctions, can make Windows Update stop working.
- Move the Package Cache folder to a different drive (superuser answer). This seems to be used by Visual Studio.


